How to Build a Sentiment Analysis API with Transformers in 2024?
Hi Everyone! 👋 Imagine you have a notebook filled with customer feedback about a product. Some customers rave about how much they love it, while others complain about delays or poor quality. How do you quickly figure out if the feedback is positive, neutral, or negative? Enter Sentiment Analysis, a process where computers analyze text and determine the emotion behind it.
Today, I’ll guide you step-by-step on how to build a sentiment analysis model using transformers (like BERT) and deploy it as an API using FastAPI. Don’t worry—I’ll explain every single thing like I’m teaching a friend. Let’s jump in!
Step 1: Setting Up Your Tools to Build a Sentiment Analysis Model
Just like a painter needs brushes and paint, we need some coding tools. Open your terminal or command prompt and type:
pip install transformers tensorflow torch scikit-learn fastapi uvicornWhy do we need these?
transformers: A library that provides pre-trained models like BERT (Bidirectional Encoder Representations from Transformers). BERT is like an all-knowing language wizard that understands human text.tensorflow: A popular machine learning framework. It’s like the kitchen where we’ll cook our model.torch: Another framework similar to TensorFlow but often used withPyTorch-based models.scikit-learn: A toolkit for data preprocessing and evaluation. Think of it as the knife and chopping board for our data.fastapi: A framework to create APIs—like building a door so others can use our model.uvicorn: A server that runs our API, ensuring it’s fast and responsive.
Step 2: Preparing the Data
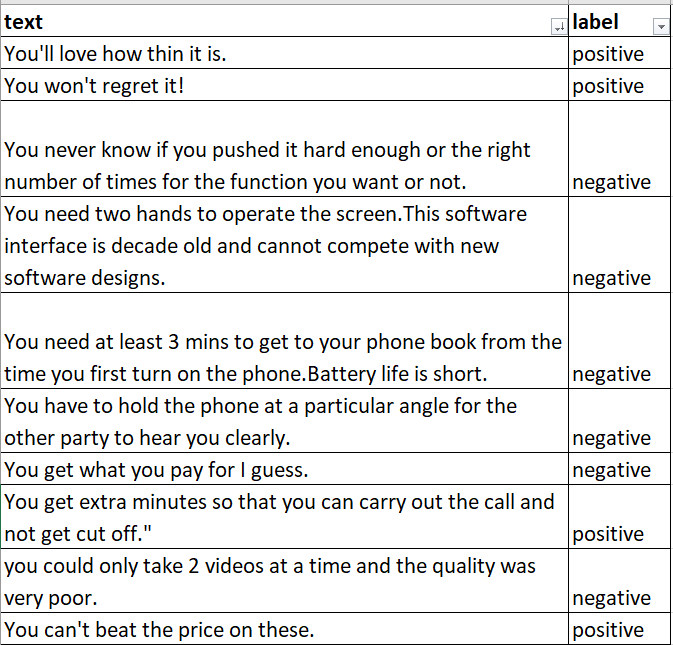
Let’s start with customer feedback stored in a file called feedback.csv. This file has two columns:
- text: The feedback itself, e.g., “The product quality is amazing!”
- label: Whether the feedback is positive, neutral, or negative.
Step 2.1: Load the Data
We’ll use the pandas library to read the file like a spreadsheet.
import pandas as pd
# Load the CSV file
data = pd.read_csv('feedback.csv')
# Peek at the data
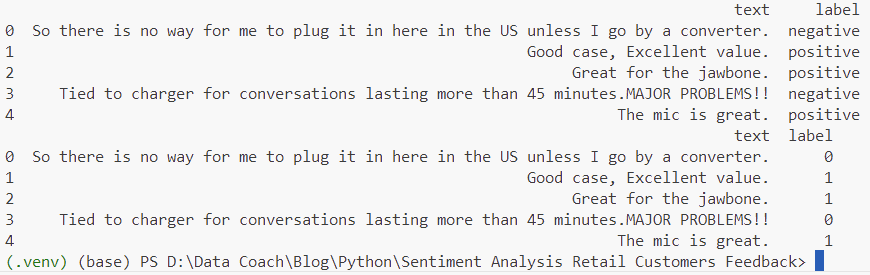
print(data.head())This might print something like:
Step 2.2: Convert Labels to Numbers
Machines don’t understand words like “positive” or “negative.” So, we’ll convert these into numbers:
- positive → 1
- negative → 0
We’ll use LabelEncoder from scikit-learn for this.
from sklearn.preprocessing import LabelEncoder

# Convert labels to numbers
from sklearn.preprocessing import LabelEncoder

label_encoder = LabelEncoder()
data['label'] = label_encoder.fit_transform(data['label'])

print(data.head())
Now the data looks like this:
Step 2.3: Split the Data
We need to divide the data into:
- Training Data: 80% of the data to train our model.
- Testing Data: 20% of the data to evaluate how well the model works.
Here is the code to do the same:
from sklearn.model_selection import train_test_split

X_train, X_test, y_train, y_test = train_test_split(
    data['text'], data['label'], test_size=0.2, random_state=42
)
Step 2.4: Tokenize the Text
A tokenizer breaks sentences into smaller chunks (called tokens) and prepares them for the model. Imagine your model is like a person who only reads in chunks of 128 words. The tokenizer ensures every piece of feedback fits into that chunk size. For this, we’ll use the BERT tokenizer from the transformers library.
from transformers import BertTokenizer

# Load the pre-trained BERT tokenizer
tokenizer = BertTokenizer.from_pretrained('bert-base-uncased')

# Tokenize the text
def tokenize_texts(texts, tokenizer, max_length=128):
    return tokenizer(
        list(texts),           # Input texts
        max_length=max_length, # Max length for each tokenized sentence
        truncation=True,       # Truncate long sentences
        padding=True,          # Pad short sentences
        return_tensors='tf'    # Output format for TensorFlow
    )

train_encodings = tokenize_texts(X_train, tokenizer)
test_encodings = tokenize_texts(X_test, tokenizer)
Step 3: Building the Transformer Model
The heart of our project is the BERT model, which is like a pre-trained brain. We’ll use a version of BERT designed for classification tasks.
from transformers import TFBertForSequenceClassification
import tensorflow as tf

# Load the pre-trained BERT model for sequence classification
model = TFBertForSequenceClassification.from_pretrained(
    'bert-base-uncased',
    num_labels=2  # 2 labels: positive and negative
)

# Compile the model
model.compile(
    optimizer=tf.keras.optimizers.Adam(learning_rate=5e-5),
    loss=tf.keras.losses.SparseCategoricalCrossentropy(from_logits=True),
    metrics=['accuracy']
)

# View the model summary
model.summary()
Step 4: Training the Model
Let’s feed the tokenized data into the model and train it.
# Create TensorFlow datasets
train_dataset = tf.data.Dataset.from_tensor_slices((
    dict(train_encodings), y_train
)).shuffle(1000).batch(16)

test_dataset = tf.data.Dataset.from_tensor_slices((
    dict(test_encodings), y_test
)).batch(16)

# Train the model
history = model.fit(
    train_dataset,
    validation_data=test_dataset,
    epochs=3,     # Number of training rounds
    batch_size=16 # Number of samples processed at a time
)
Step 5: Evaluating the Model
Let’s see how well the model performs:
# Evaluate on test data
loss, accuracy = model.evaluate(test_dataset)
print(f"Test Accuracy: {accuracy:.2f}")
Step 6: Saving the Model
To use the model later (e.g., in an API), save it:
model.save_pretrained('sentiment_model')
tokenizer.save_pretrained('sentiment_model')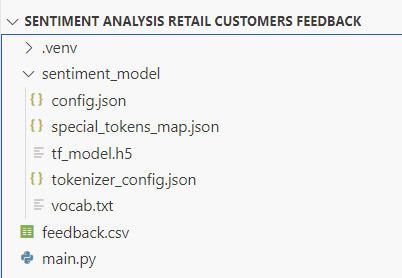
Step 7: Creating the API
Now, let’s create an API using FastAPI. This will allow others to send text and get the sentiment back. Copy the entire code in “app.py“.
from fastapi import FastAPI
from pydantic import BaseModel
from transformers import BertTokenizer, TFBertForSequenceClassification
import numpy as np
app = FastAPI()
# Load the saved model and tokenizer
tokenizer = BertTokenizer.from_pretrained('sentiment_model')
model = TFBertForSequenceClassification.from_pretrained('sentiment_model')
# Define the input format
class FeedbackRequest(BaseModel):
text: str
@app.post("/predict")
def predict_sentiment(feedback: FeedbackRequest):
# Tokenize the input text
inputs = tokenizer(
feedback.text, return_tensors="tf", truncation=True, padding=True, max_length=128
)
outputs = model(inputs)
predicted_class = np.argmax(outputs.logits, axis=-1).item()
sentiment = ["Negative", "Neutral", "Positive"]
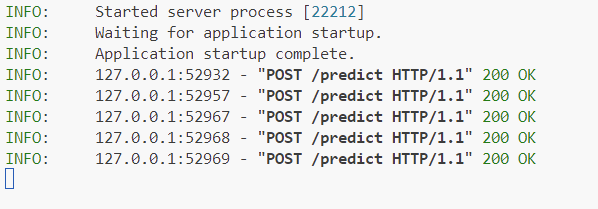
return {"sentiment": sentiment[predicted_class]}Execute the application: python .\app.py
Step 8: Running the API
Then, uvicorn app:app --reload
Step 9: Using the Sentiment Analysis API Programmatically
To use the sentiment analysis API programmatically, you can make requests to it using Python’s requests library. Here’s how you can do it step by step:
Step 1: Install the Requests Library
If you don’t already have the requests library installed, run this command in your terminal:
pip install requestsStep 2: Write the API Request Code
Once the FastAPI server is running (with uvicorn app:app --reload), you can interact with it. Here’s how you can send a POST request to the API to analyze the sentiment of a given piece of text.
import requests

# Define the API endpoint
url = "http://127.0.0.1:8000/predict"

# Define the input text you want to analyze
feedback_text = {
    "text": "I love the quality of this product, it exceeded my expectations!"
}

# Make a POST request to the API
response = requests.post(url, json=feedback_text)

# Check if the request was successful
if response.status_code == 200:
    # Parse the response
    result = response.json()
    print("Sentiment Analysis Result:", result)
else:
    print("Failed to connect to the API. Status code:", response.status_code)
    print("Error details:", response.text)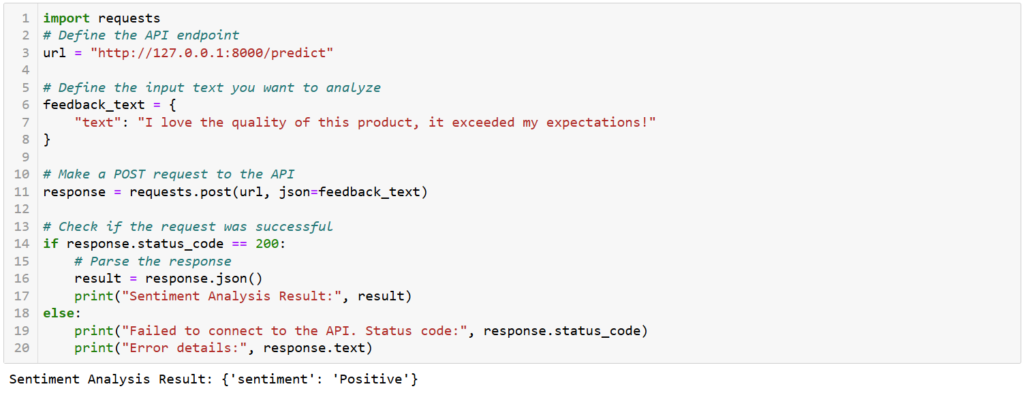
What’s Happening Here?
url: This is the address of the API. Make sure it matches where your server is running. Default:http://127.0.0.1:8000/predictfeedback_text: This is the input data you’re sending to the API. The keytextmatches theFeedbackRequestmodel we defined earlier in the FastAPI app.requests.post: Sends a POST request to the server with the feedback text as a JSON payload.response.json(): Converts the server’s response (which is in JSON format) into a Python dictionary.
Handling Errors
If something goes wrong (like the server is not running or the input is incorrect), you’ll get an error message. Always check the response.status_code to debug.
For example:
- 200: Success!
- 422: Validation error (e.g., missing
textkey). - 404: API endpoint not found (check the URL).
- 500: Server error (likely an issue with the FastAPI app).
Looking for more interesting Machine Learning Projects, read my article on How to Predict Concrete Strength using Machine Learning?
Testing Multiple Inputs
You can also send multiple feedback texts by looping through them:
import requests
# Define the API endpoint
url = "http://127.0.0.1:8000/predict"

# Define the input text you want to analyze
feedbacks = [
    "The product is fantastic, I love it!",
    "Terrible service, will not order again.",
    "It was okay, nothing special."
]

for feedback in feedbacks:
    response = requests.post(url, json={"text": feedback})
    if response.status_code == 200:
        print(f"Feedback: {feedback} -> Sentiment: {response.json()['sentiment']}")
    else:
        print(f"Error analyzing feedback: {feedback}")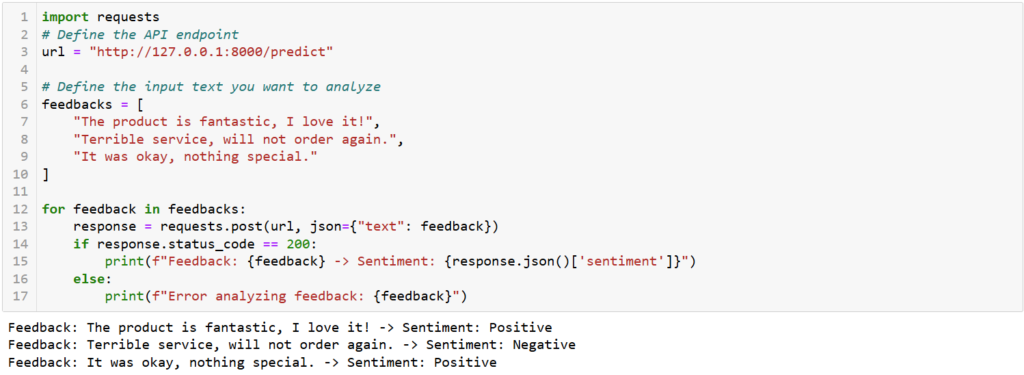
This approach is beginner-friendly and works well for interacting with APIs in Python.
GitHub Repository Link: https://github.com/data-coach/sentiment-analysis-retail-customers-feedback-transformer-bert.git
Conclusion – Build a Sentiment Analysis API with Transformers
You’ve just built and deployed a sentiment analysis model! 🎉 Your API is ready to help analyze customer feedback. Would you like me to include code explanations or deployment tips? Contact Us or Connect with me on LinkedIn.
Ever wondered how companies analyze thousands of customer reviews to understand feedback? In this hands-on guide, we’ll build a Sentiment Analysis model using Transformers like BERT. From fine-tuning the model to deploying it as an API with FastAPI, this blog simplifies every step with code and beginner-friendly explanations. Perfect for students and budding developers!
2 Comments